Eyes are often considered the focal point of any makeup look, and understanding how to enhance your specific eye shape can make a world of difference in your overall appearance. As an editorial makeup artist, I've worked with countless eye shapes and have developed techniques to accentuate the natural beauty of each one.
In this comprehensive guide, we'll explore the characteristics of different eye shapes and share professional techniques to enhance each one. Remember that many people have combination eye shapes, so feel free to mix and match techniques that work best for you.
Identifying Your Eye Shape
Before diving into specific techniques, let's discuss how to identify your eye shape. Look straight into a mirror with a relaxed expression and consider these characteristics:
- Is your crease visible when your eyes are open?
- Can you see the entire iris, or is part of it covered by your upper or lower lid?
- Do your eyes appear to tilt upward or downward at the outer corners?
- Are your eyes set wide apart or close together?
- Do your eyelids appear to have extra skin that folds over the crease?
These observations will help you determine which of the following eye shapes you have, though many people have combination shapes that share characteristics of multiple types.
Almond Eyes
Almond eyes are often considered the "standard" in makeup tutorials. They're characterized by a visible crease, with the iris partially covered by the upper and lower lids, creating an almond-like shape.
Makeup Techniques for Almond Eyes:
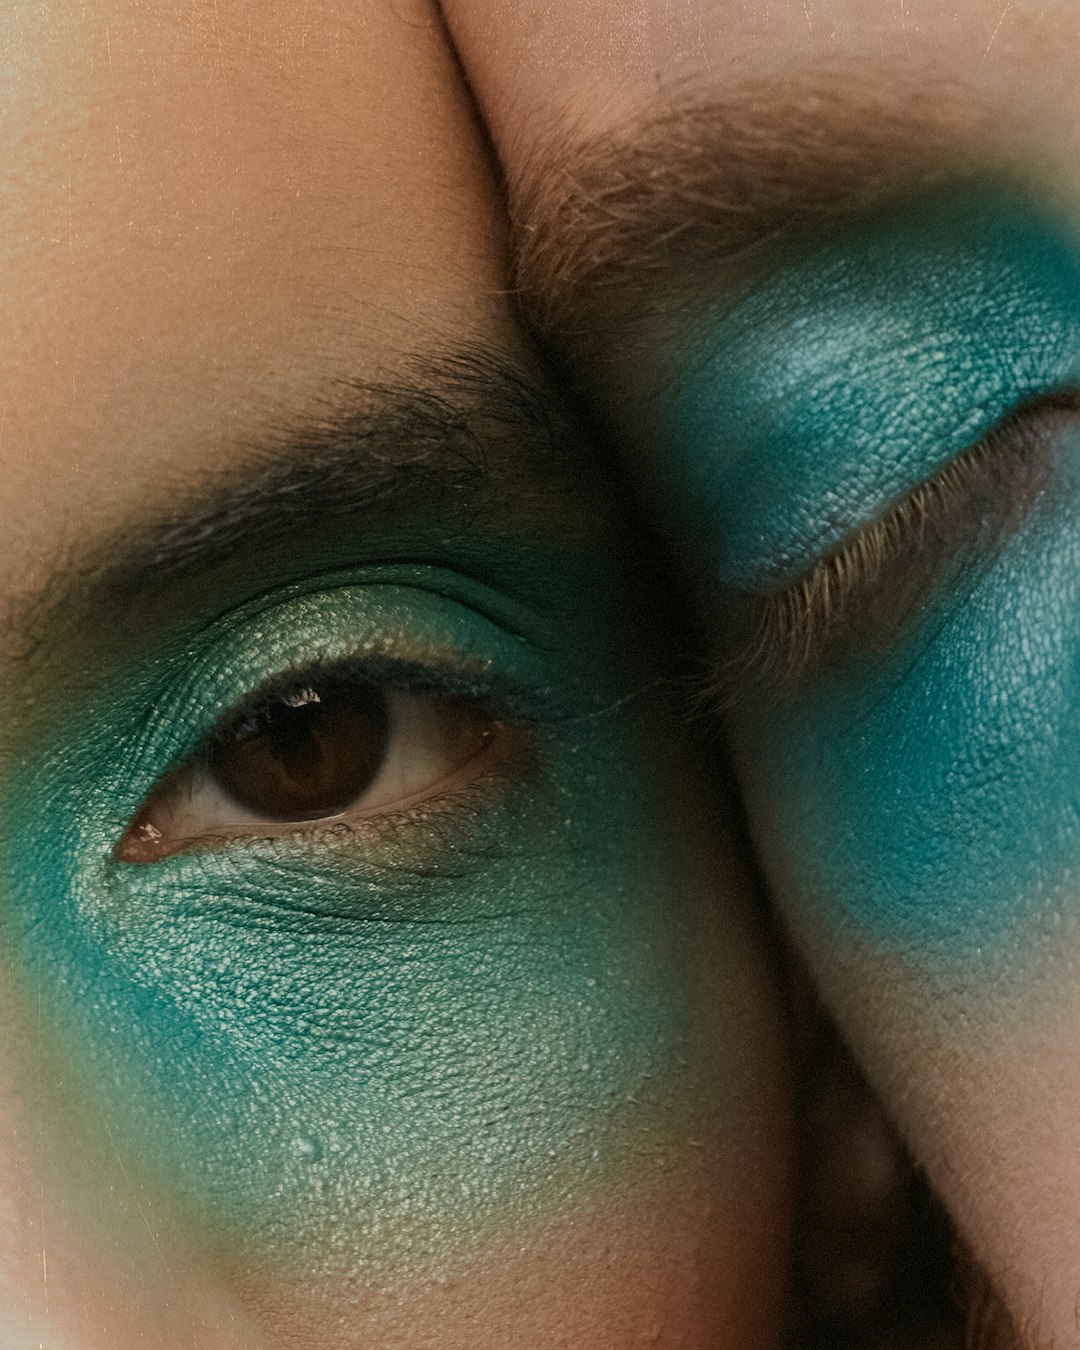
- Eyeshadow Placement: Almond eyes work well with classic eyeshadow techniques. Apply medium tones across the lid, darker shades in the outer corner and crease, and highlight the inner corner and brow bone.
- Eyeliner: A classic winged liner follows and enhances the natural almond shape. Experiment with the thickness of the line based on your preference.
- Mascara: Focus on both upper and lower lashes to frame the eye. Consider individual false lashes at the outer corners for special occasions.
Pro Tip:
One of the advantages of almond eyes is versatility. Don't be afraid to experiment with bold colors and graphic liner shapes—almond eyes can typically carry a variety of looks successfully.
Hooded Eyes
Hooded eyes have a fold of skin that droops over the crease, partially or completely hiding the mobile lid when the eyes are open. This shape is common as we age but can also be genetic.
Makeup Techniques for Hooded Eyes:
- Eyeshadow Placement: Apply shadow with your eyes open to ensure proper placement. Create depth above the crease (where it will be visible), keeping the actual crease area light to make eyes appear more open.
- Eyeliner: Thin liner works best, as thick lines can disappear when eyes are open. Consider "floating" or "batwing" liner techniques that are visible with open eyes.
- Mascara: Curl lashes thoroughly and use lengthening mascara to open up the eyes. Focus on the center lashes to create the illusion of rounder, more open eyes.
Pro Tip:
Matte eyeshadows tend to work better on hooded eyes as they create more definition without adding shine to the hooded area. Save shimmer for the inner corner or center of the lid only.

Round Eyes
Round eyes are characterized by their circular shape, with the whites of the eyes visible all around the iris. The crease is typically visible, and round eyes often appear larger and more open.
Makeup Techniques for Round Eyes:
- Eyeshadow Placement: Create elongation by applying darker shadows in an almond shape, extending toward the temple. Focus intensity on the outer corners to create the illusion of an elongated eye.
- Eyeliner: Wing eyeliner outward and upward to counterbalance roundness. Consider tight-lining the upper waterline without lining the entire lower lash line (which can make eyes appear rounder).
- Mascara: Focus mascara on the outer lashes rather than applying it evenly, which further helps create an elongated effect.
Pro Tip:
For round eyes, creating the illusion of length rather than width is key. Diagonal eyeshadow placement (from inner corner upward to outer corner) helps achieve this elongated effect.
Monolid Eyes
Monolid eyes have little to no visible crease when the eyes are open. The transition from the lid to the brow bone is relatively flat, which creates a unique canvas for makeup application.
Makeup Techniques for Monolid Eyes:
- Eyeshadow Placement: Create dimension by applying gradient shades from the lash line upward. Use darker colors near the lash line, gradually blending to lighter shades as you move toward the brow bone.
- Eyeliner: Thick winged liner can work beautifully on monolids, as there's no crease to interfere with the line. Consider a slight upward wing to lift the eye.
- Mascara: Curl lashes thoroughly before applying mascara, as monolid eyes can sometimes have straighter lashes that point downward.
Pro Tip:
Monolid eyes offer a beautiful canvas for graphic liner looks and bold colors that would be lost in the crease of other eye shapes. Embrace this advantage by experimenting with colorful liner or halo eyeshadow techniques.
Downturned Eyes
Downturned eyes have a slight downward tilt at the outer corners. The goal with makeup is to create a lifted effect that counterbalances this natural shape.
Makeup Techniques for Downturned Eyes:
- Eyeshadow Placement: Focus darker shades on the outer third of the lid, blending upward and outward toward the end of the eyebrow. This creates a lifting effect.
- Eyeliner: Create a wing that angles upward to counteract the downward tilt. Start the wing from the middle of the lid rather than the outer corner for maximum lift.
- Mascara: Concentrate mascara on the center and outer lashes, curling them upward to open and lift the eye.
Pro Tip:
Avoid applying dark eyeshadow or liner on the outer lower lash line, as this can emphasize the downturned shape. Instead, use lighter colors on the lower lash line or limit application to the inner two-thirds.
Upturned Eyes
Upturned eyes have a natural lift at the outer corners, with the lower lid appearing longer than the upper lid. This shape naturally draws attention upward.
Makeup Techniques for Upturned Eyes:
- Eyeshadow Placement: Balance the natural upturn by focusing darker shades on the upper crease. Create depth in the crease while keeping the outer corner relatively light.
- Eyeliner: Follow the natural lash line without exaggerating the upward tilt. Consider lining the lower lash line to create balance.
- Mascara: Apply mascara evenly to both upper and lower lashes to frame the eye without emphasizing the upturn.
Pro Tip:
Upturned eyes naturally create a lifted, cat-eye effect. To balance this, consider applying eyeshadow in a more horizontal rather than diagonal direction.
Deep-Set Eyes
Deep-set eyes sit deeper in the eye socket, with a prominent brow bone that can cast shadows on the lid. The goal is to bring the eyes forward and minimize shadows.
Makeup Techniques for Deep-Set Eyes:
- Eyeshadow Placement: Use light, reflective shades on the lid to bring the eyes forward. Keep darker shades limited to the outer corner rather than the crease.
- Eyeliner: Keep liner thin along the lash line to maximize lid space. Consider using a flesh-toned liner on the waterline to brighten the eyes.
- Mascara: Focus on curling and volumizing to make eyes appear more prominent. Consider adding individual lashes to the center of the lash line.
Pro Tip:
Color correction is key for deep-set eyes. Use a brightening concealer under the eyes and on the lid to counteract shadows before applying eyeshadow.
Close-Set Eyes
Close-set eyes have less space between them than the width of one eye. The goal is to create the illusion of more space between the eyes.
Makeup Techniques for Close-Set Eyes:
- Eyeshadow Placement: Apply lighter shades to the inner third of the eye and darker shades to the outer corner, blending outward toward the temple.
- Eyeliner: Start liner from the middle of the lid rather than the inner corner, gradually thickening toward the outer corner with a small wing.
- Mascara: Focus mascara on the outer lashes to draw attention outward rather than inward.
Pro Tip:
Highlighting the inner corner of the eye with a bright, reflective shade can create the illusion of more space between close-set eyes.
Wide-Set Eyes
Wide-set eyes have more space between them than the width of one eye. The goal is to create a more balanced appearance by drawing attention inward.
Makeup Techniques for Wide-Set Eyes:
- Eyeshadow Placement: Apply darker shades to the inner corner and lighter shades to the center and outer corner of the lid.
- Eyeliner: Start liner at the inner corner and keep it thicker there, gradually thinning it toward the outer corner.
- Mascara: Focus on the inner and center lashes to draw attention inward.
Pro Tip:
Contouring the bridge of the nose can help create the illusion of less space between wide-set eyes. Use a matte contour shade on either side of the nose bridge to visually narrow the area.
Final Thoughts
Remember that these guidelines are just starting points—feel free to adapt them to your preferences and style. The most important aspect of makeup is that it makes you feel confident and beautiful.
Understanding your eye shape is empowering because it allows you to work with your natural features rather than against them. By applying techniques specific to your eye shape, you can enhance your unique beauty and create makeup looks that truly complement your features.
If you're interested in learning more personalized techniques for your specific eye shape, consider booking a personal makeup lesson with one of our professional makeup artists at Moment Craft. We'd be delighted to help you discover the most flattering techniques for your unique features.
Do you have any specific questions about applying makeup for your eye shape? Let us know in the comments below!